Archive
PowerShell: Get Current User’s Security Permissions
I was writing a little script and thought that needs to ensure it has sufficient privileges. I thought it would be more useful to find if the current user is part of any of the built in user roles. Here is my effort:
function
Get-CurrentUserRoles {
$SecurityPrinciple
=
New-Object
-TypeName
System.Security.Principal.WindowsPrincipal
-ArgumentList ([System.Security.Principal.WindowsIdentity]::GetCurrent())
$RolesHash
= @{}
[System.Enum]::GetNames(“System.Security.Principal.WindowsBuiltInRole”) | ForEach-Object {
$RolesHash[$_] =
$SecurityPrinciple.IsInRole([System.Security.Principal.WindowsBuiltInRole]::$_)
}
$RolesHash
}
PS C:\> Get-CurrentUserRoles
Name Value
—- —–
Administrator True
User True
Guest False
PowerUser False
AccountOperator False
SystemOperator False
PrintOperator False
BackupOperator False
Replicator False
PS C:\> (Get-CurrentUserRoles).Administrator
True
PS C:\> (Get-CurrentUserRoles).Guest
False
As you can see, you get back PowerUser, Administrator, SystemOperator, etc.
Team Foundation Services and PowerGUI – Using PowerShell with Version Control
Version control allows you and others to work on the same scripts, check them in and out, etc. By following these steps, it is possible to use version control system for PowerShell as well as a number of other programming languages.
For PowerShell, PowerGUI is by far my favourite GUI/Script Editor, it is free, far superior to ISE (which is improving) and my preference to PrimalScript. Although PowerGUI is my preference for PowerShell development, for pretty much all other scripting, PrimalScript is superb.
Primal’s PowerShell Studio is an excellent PowerShell GUI/Script Editor. It has a similar feature set to PowerGUI, with some advantages and some disadvantages- one thing that it excels at is PowerShell GUI development.
One thing that PowerGUI, PowerShell Studio and PrimalScript all have in common, is that they support the MSSCCI provider/Source Control Plug-in API. The following guide shows you how to install the provider and configure PowerGUI to use it.
Requirements
-
Microsoft TFS Source Code Version Control System
-
- Free for up-to 5 people.
- Based online, hosted by Microsoft.
- Private
-
- Free for up-to 5 people.
- Private install.
- Designed for small teams to collaborate.
- Local
-
- For many users.
- Role based
- Feature Rich.
-
- Team Explorer for Visual Studio 2012
- Microsoft Visual Studio Team Foundation Server 2012 MSSCCI Provider
- PowerGUI Script Editor
- A test PowerShell script to upload to the repository.
Installation Instructions
As there are many options for TFS, I will not go into installation and setup of TFS. For the examples, I will be using Team Foundation Services Online.
- Install the PowerGUI Script Editor.
- Accept the license agreements and install the defaults.
- Launch setup for Team Explorer for Visual Studio 2012.
- Agree to the license agreement and press the Install button.
- Press the ‘Launch’ button once installation has completed.
- Launch the Microsoft Visual Studio Team Foundation Server 2012 MSSCCI Provider. This is the 32-bit installer and is required for PowerGUI and other script editors.
Configure Team Foundation Server Explorer
- Press the ‘Connect to Team Foundation Server’ and press the ‘servers’ button.
- Press ‘Add…’ and enter details of the Team Foundation Server. Press OK. (you may be prompted to sign in)

- Press the close button.
- Select the Team Projects you wish to import. Press ‘Connect’.
- Click the Source Control Explorer link.
- Right click and choose ‘Add Items to Folder’. Choose a PowerShell Script to upload.
Configure PowerGUI to use Team Foundation Server
- Launch PowerGUI Script Editor.
- Select the ‘Tools’ menu -> ‘Options’.
- Select ‘Version Control’. Select ‘Team Foundation Server MSSCCI Provider’. Click Advanced.
-
Select Check In and press OK, and OK again.
- PowerGUI will now have a ‘Version Control’ menu.
- Choose ‘Get Files from Version Control’.

- The Team Foundation Server should be available in the list. Click OK.
- Expand $/ and select the project beneath.
- Click the ‘Browse’ button. Create a new folder for the local copy of the script repository.
- Press OK.
- After a few moments (depending on speed of connection to the TFS server) an Open dialog will be shown.
- Open the sample script.
Using Team Foundation Server with PowerGUI
- Creating a new script in the folder linked with the repository will cause it to be uploaded to TFS.
- Modifying a script checks it out.
Find All Old Files The PowerShell Way
Last week, a colleague asked for help to find files older than a certain date. For this, it appears that Symantec NetBackup has a bug where if it is performing a backup with files that are created with a date older than 01/01/1980, NetBackup performs a full system backup instead of differential. Symantec have knowledge article TECH23000 (opens in new window) about it ‘STATUS CODE 0: INCREMENTAL backups run as a FULL backup despite the last FULL having backed up all files with Status 0. The bpbkar log reports “folder <folder_name> has been created recently (since 11/9/02 11:35:32 AM). It will be backed up in full.”’
The article discusses methods of resolving this behaviour- that include performing the following command “C:\dir *.* /S /TC >C:\creation.txt” (which is incorrect and should be dir “c:\*.* /S /TC >C:\creation.txt“) but does not give any suggestion as to how to find the offending items.
Being on a Windows 2008 server, I thought that as this server is running Windows Server 2008, PowerShell is installed and would provide the easiest way. Here is the script that I cam up with:
$OldestDate = Get-Date "29/02/2012" # Set the oldest date. Enter it in the local date/time format.
$Files = @() # Define $Files variable as an empty array.
$Drives = Get-WmiObject Win32_Volume | Where-Object {($_.DriveType -eq 3) -and ($_.Label -ne "System Reserved")} # Get a list of volumes from wmi, and find drivetype 3 (local disk) that do not have the volume label "System Reserved"
foreach ($Drive in $Drives)
{
 Get-ChildItem -Path ($Drive.DriveLetter + "\") -Recurse | foreach {if ($_.CreationTime -le $OldestDate) {$Files += $_}
} # get each file, test if it's creation time isolder than $OldestDate and add to $files}
$Files | Format-Table FullName, CreationTime #Format $Files as a table for display. Could also Export-CSV or the like.
PowerShell Script to Download SysInternals Suite Files
Below is a very simple PowerShell script to copy any new or newer versions of the SysInternals tools:
Set-Locationc:\temp\Sysinternals
$SysInternals=Get-ChildItem \\live.sysinternals.com\tools\*-Exclude *.txt, *.scr
foreach ($Filein$SysInternals) {
if (Test-Path$File.Name) {
if ($File.LastWriteTime-ne (get-Item$File.Name).LastWriteTime) {
Write-Host$File.Name“is out of date. Downloading new version…“
Copy-Item$file-Force
} #end If LastWriteTime
else {
Write-Host$File.Name“is up to date.“
} #end If LastWriteTime
} #end Test-Path
else {
Write-Host$File.Name“is new. Downloading…“
Copy-Item$file-Force
} #end else Test-Path
} #end foreach $file
Configuring Windows 2008 R2 Core on VMware ESXi
Pre-Requisites
- ESX(i) 4.1 or higher (as we will use the PVSCSI controller as the boot device. I use ESX 5.0 in this example.
- Microsoft Windows Server 2008 R2 iso image on a datastore.
- The Core Configuration 2.0 (x64) iso image– This simplifies updating the drivers.
Installation Steps
Create a new Virtual Machine.
- Create a new VM.
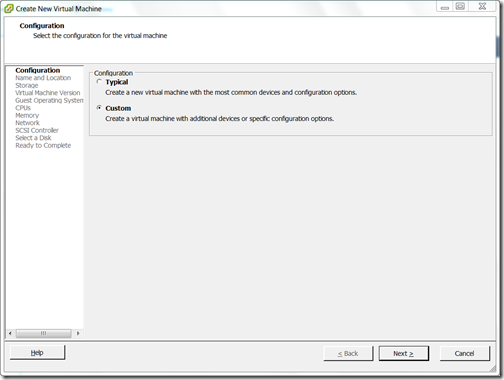
- Select Configuration ‘Custom’.
- Name the virtual machine.

- Select a suitable datastore.

- Select ‘Virtual Machine Version: 8’
- Select Guest Operating System ‘Windows’, Version ‘Windows Server 2008 R2 (64-bit)
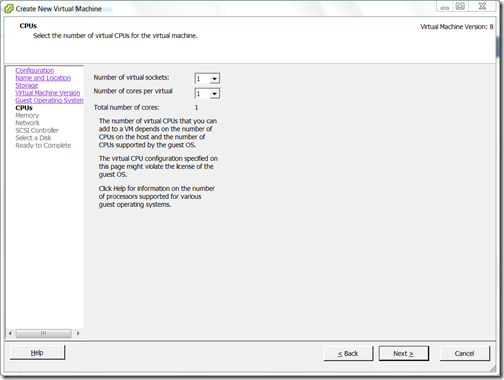
- Select the number of CPU virtual sockets and cores according to your needs.
- Select the amount of memory according to your needs.
- Set ‘How many NICs do you want to’ to how many NICs you require. Select the network and set the adapter to ‘VMXNET3’.
- Set the SCSI controller to ‘VMware Paravirtual’
- Select to create a new disk. Choose the capacity of the new virtual disk and the Disk provisioning type.
- Leave the advanced options to the default values.
- Click the ‘Edit the virtual machine settings before’ and press Continue.
- Go into the options tab, Advanced –> Boot Options. Select ‘EFI’ Firmware type.

- In the Hardware tab, select ‘New CD/DVD (adding)’. . Tick the ‘Connect at power on’. Check the ‘Datastore ISO file:’ and press Browse. Select your ISO image.

- Select ‘New Floppy (adding)’. Tick the ‘Connect at power on’. Check the ‘Use existing floppy image in datastore:’ and press Browse.
- Look in the ‘Datastores\vmimages\floppies’ folder and select ‘pvscsi-Windows2008.flp’

- Click Finish.
Install Windows 2008 R2 Core
- Open the VM’s console.
- Power on the VM.
- Press any key to boot from the DVD. If you miss it (it can be too quick for the console to react), press Ctrl+Alt+Insert (that sends a ctrl+alt+del to the VM. Try again.
- When setup has started, select you regional settings. Press Install Now.
- Select the Windows version.
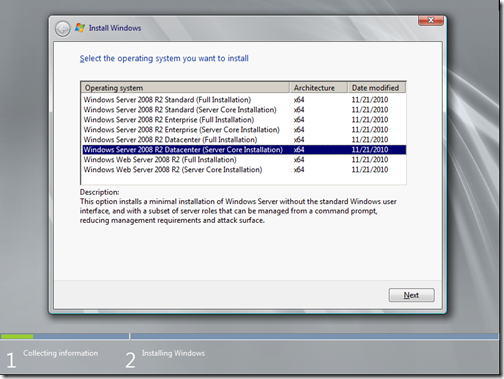
- Accept the EULA.
- Choose a ‘Custom (advanced)’ installation.
- On the ‘Where do you want to install Windows?’ page, click the ‘Load Driver’ link. Press the OK button.
- On the ‘Select a driver to be installed.’ dialog, ensure ‘VMware PVSCSI Controller (A:\amd64\pvscsi.inf)’ and press ‘Next’ .
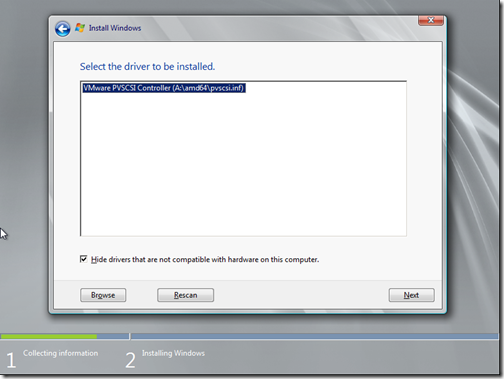
- Back in the ‘Where do you want to install Windows?’ page, ‘Disk 0’ should appear. Click ‘Next’
- Windows will install.
Configure Windows 2008 R2 Core
- Once Windows is installed, confirm the Administrator password and log on.
- You will be presented with a command prompt. From the VM console’s toolbar, select the ‘Connect/disconnect the CD/DVD device of the virtual machine’ button and select ‘CD/DVD drive 1’ –> ‘Disconnect from the datastore image’
- From the VM console’s menu bar, choose ‘VM’ –> ‘Guest’ –> ‘Install/Upgrade VMware Tools’.
- Run the setup program from the command prompt. Type ‘D:’ press enter, type ‘setup’ and press enter again.

- Install the VMware Tools using all of the default options. Allow setup to reboot the operating system once installation has completed. The NIC drivers, VMware keyboard and VMware mouse will be installed.
- Log back in.
- Select the ‘Connect/disconnect the CD/DVD device of the virtual machine’ button and choose ‘Connect to ISO image on a datastore’. Locate and choose the Microsoft Core Configuration iso image.
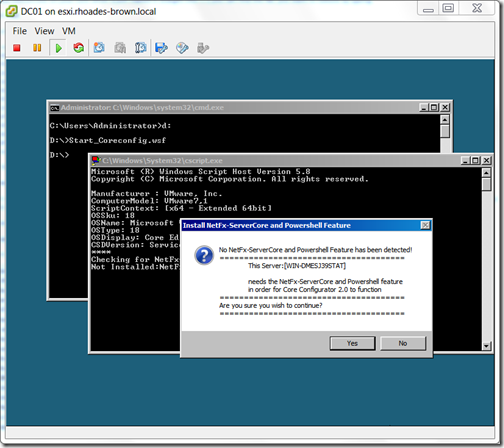
- Start Core Config by typing ‘D:’ and pressing enter, type ‘Start_Coreconfig.wsf’ and press enter.
- A dialog asking to install the .NET Framework and Microsoft PowerShell appears, press the ‘Yes’ button.
- Press the ‘Control Panel’ button, press ‘Add drivers’.
- Press the ‘Have Disk…’ button. Navigate to ‘C:\Program Files\Common Files\VMware\Drivers\wddm_video’ and select ‘vm3d.inf’.
- The updated driver driver will be installed. Exit the Core Configuration and restart the VM again. The VM restart at a higher resolution, with better mouse precision and you will be able to pass the edges of the window. The Core Configurator tool is very useful for configuring a Windows Core server, you can use it to install and remove features, configure and perform Windows updates, Remote Desktop and Remote management, computer name, domain membership, DC Promo and licensing.
Building a DD-WRT Image In vSphere 5.0
Introduction
I have a need to put a router between my test ESXi 5.0 server and my network. At home, I use a Linksys E3000 (both 2.4Ghz & 5Ghz Wireless-N, gigabit) router, with OpenSource DD-WRT custom firmware. There is a x86 variant that can be downloaded, people mention in the forums about using it on old PCs, I thought I would give making a VM a go.
Pre-Requisites
- An installed copy of ESXi 5.0 (this is almost certain to work on 4.0, but not 3.5)
- The DD-WRT x86 Image. I chose the VGA public image. This is a free version, limited to 4096 connections (fine for my purposes) and without Wi-Fi support. The image that is used is here.
- physdiskwrite – A Windows tool for writing raw images to a hard disk.
- An existing Windows image.
InstallationCreating the Virtual Machine
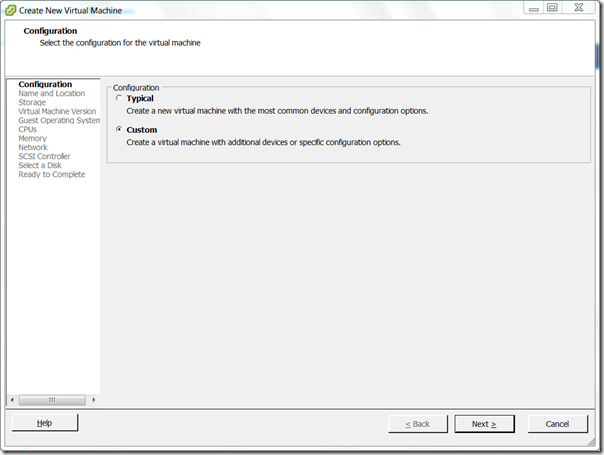
- Create a virtual Machine. Select a configuration type of Custom.
- Name the VM something appropriate.
- Select a datastore for the Virtual Machine.
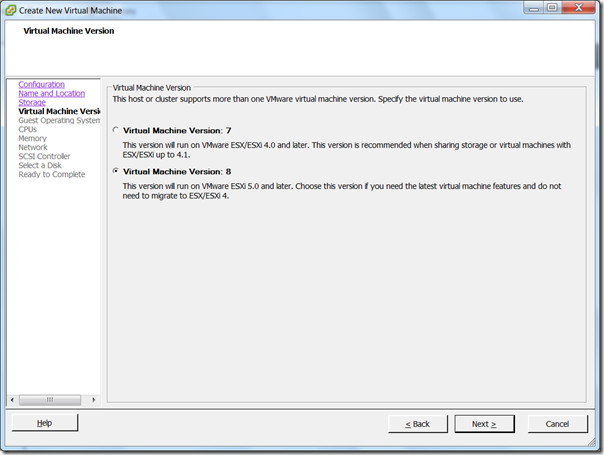
- Select ‘Virtual Machine Version: 8’ (if using ESXi 4.0, using version 7)
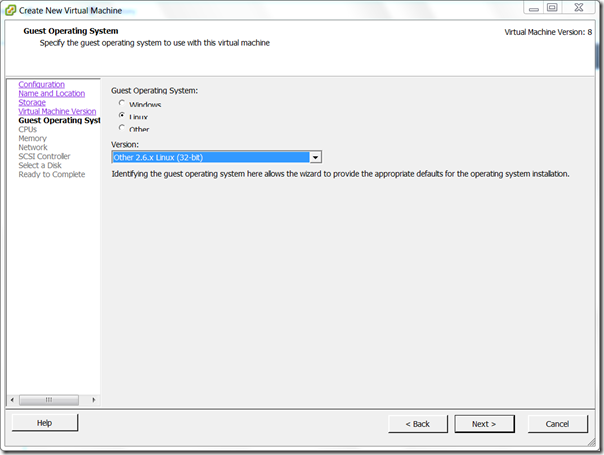
- For Guest Operating System type, choose ‘Linux’ and select ‘Other 2.6.x Linux (32-bit) from the drop down.
- Choose 1 virtual sockets, with one core per virtual socket.
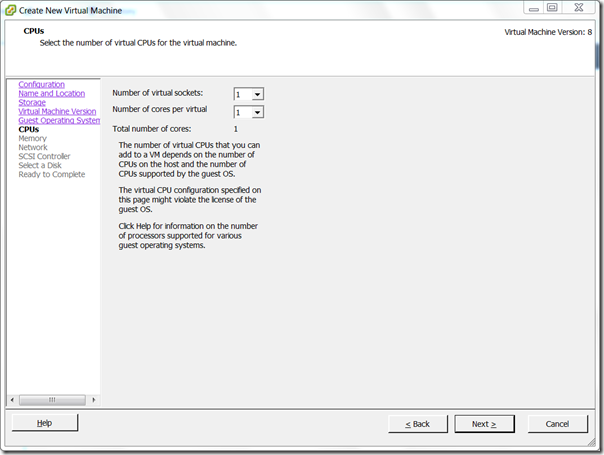
- Choose 512MB RAM.

- Select the appropriate number of NICs (nearly always 2), E1000, and choose the port groups. (I have found that the first NIC is assigned to the WAN)
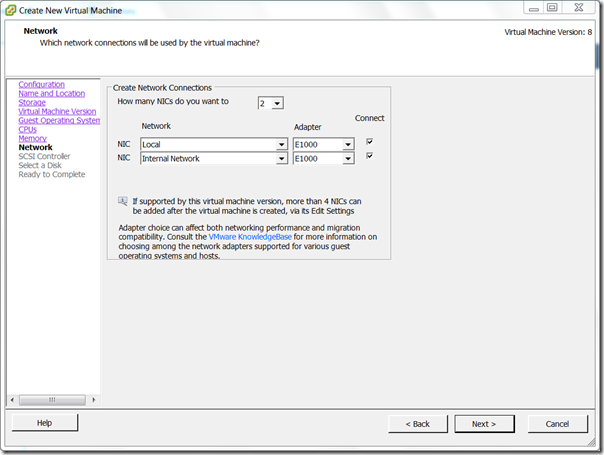
- SCSI Controller, choose any. This will be replaced.
- Choose not to create a disk.
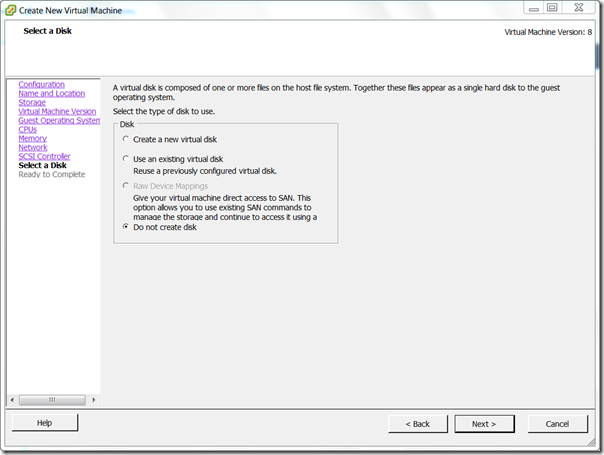
- Tick Edit the virtual machine settings before.
- In the Virtual Machine Properties, click Add. Select Hard Disk.
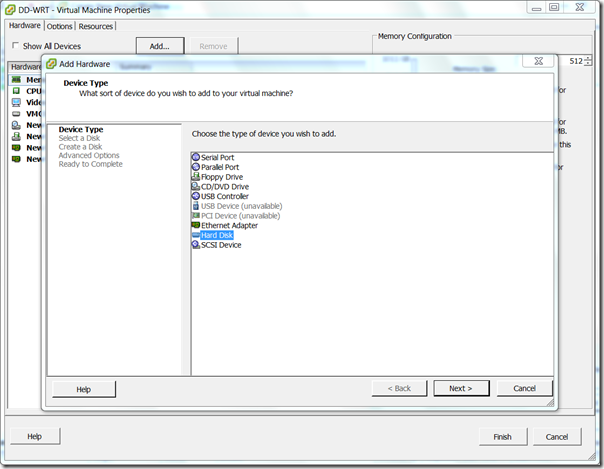
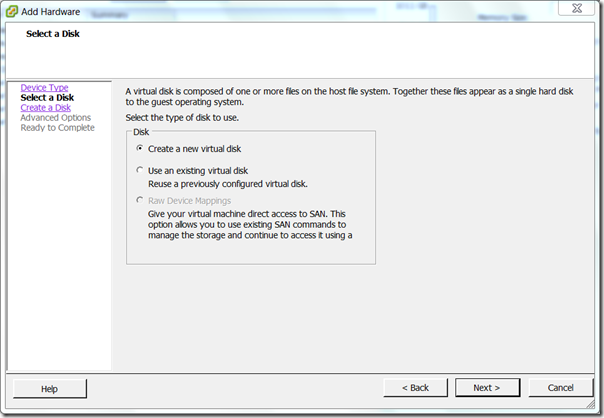
- Select ‘Create a new virtual disk’
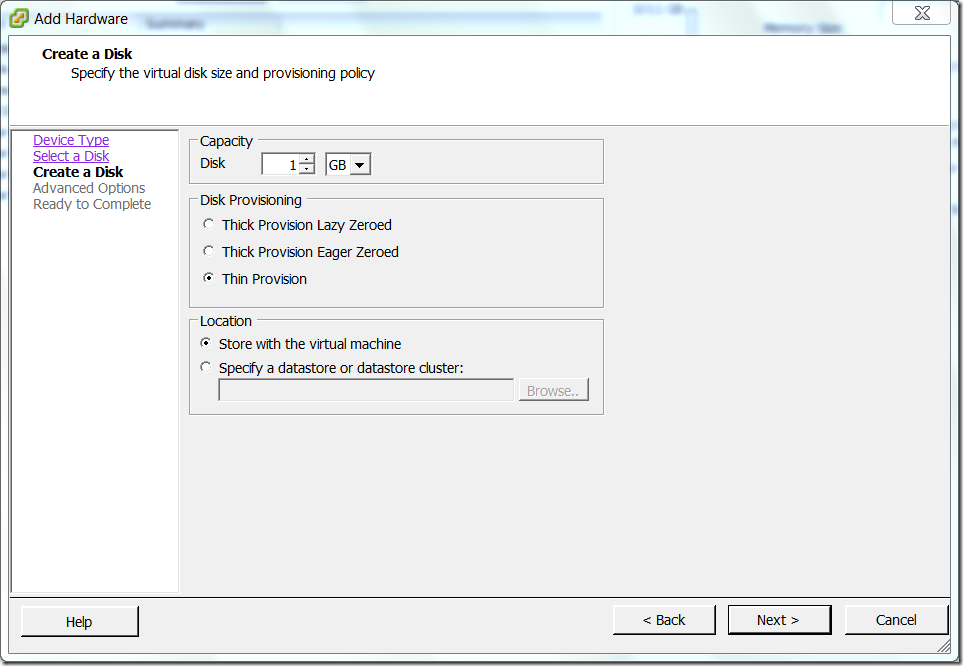
- Make the capacity of the disk 1GB. I chose to make it Thin Provisioned.
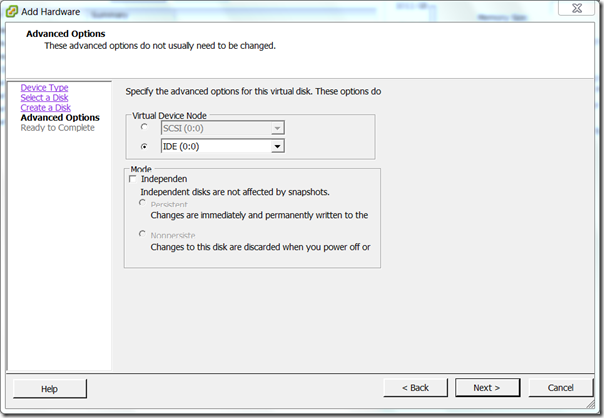
- Set the Virtual Device Node to IDE (0:0)
- Press OK, then Finish. Wait for the VM to be created.
Install the image to the Disk
- Choose your Windows VM. Power it off if necessary.
- Edit the Windows VM’s properties. Press Add.
- Select a Hard Disk.
- Choose ‘Use Existing Virtual Disk’
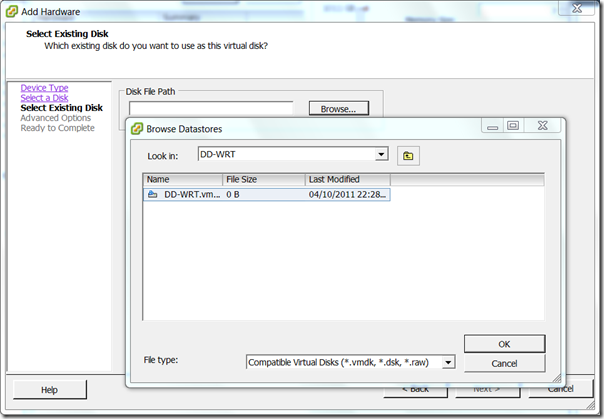
- In Advanced Options, ensure that the Virtual Device Node is ‘IDE (0:0)’
- Click OK, then Finish. Power on the Windows VM.
- Load PhysGUI (make sure you elevate it)
- Ensure that you select the ‘VMware Virtual IDE Hard Drive ATA Device’, right click select ‘Image laden’ –> ‘Öffinen’. Select the downloaded DD-WRT image.

- Click OK through the prompts.
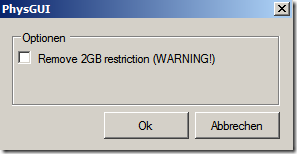
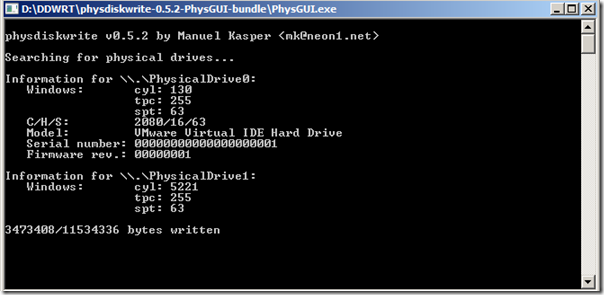
- Wait until the disk completes writing. Shut down the VM.
- Edit the Windows VM’s properties. Select the DD-WRT virtual disk and press remove. Ensure ‘Remove from virtual machine’ is selected. Click OK.
- Start up the DD-WRT VM.
Connecting to the Router
- Load another VM on the same LAN as the router. Ensure that it is configured to automatically obtain an IP address.
- It should be assigned an IP by the DD-WRT router’s DHCP server service. You can see this by performing an ipconfig (if using a Windows client)
- Presuming that you have an IP address, use the web browse to connect to 192.168.1.1
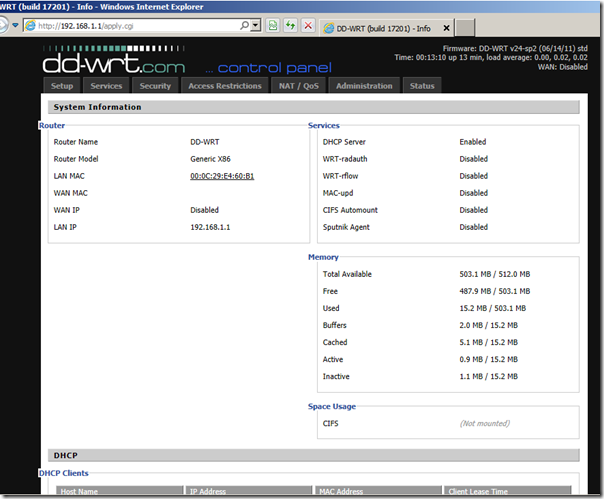
- It will ask to set the username and password. Note that if you SSH into the router at a later point, it will use the username ‘root’ with the password set here.
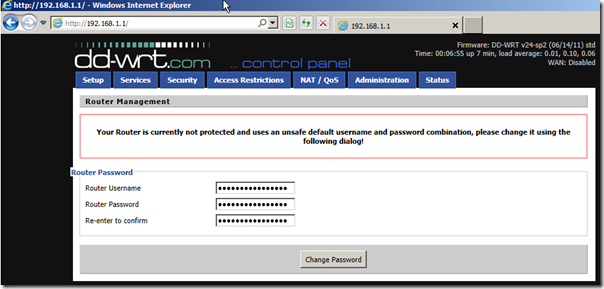
- You are presented with the DD-WRT System Information page. This will show the current hardware, configuration, DHCP client list, etc.
vSphere 5.0 Released!
vSphere 5.0 has been released. Download your copy today.
Managing an iLO from the OnBoard Administrator of an HP C-Class Enclosure
I have been performing some work on an HP BladeSystem C7000 Enclosure this morning.
We have issues where the iLOs either have incorrect IP addresses or become unresponsive- issues caused by a bug in the old firmware releases.
What I needed to do was restart the iLO without impacting the blade, I could not simply log onto the iLO as it had an incorrect IP address. Beneath is an undocumented method to reset the iLO.
All command listed bellow must be issued from an SSH or telnet session to the active Onboard Administrator. I recommend PuTTY as the client; it is dead simple to use is surprisingly feature rich and best of all is free.
Reset a Nonresponsive or Inaccessible iLO
Replace ## with the blade slot of the blade that iLO resides on.
connect server ##
cd /map1
reset
The interface will become non-responsive for a while (less than one minute) while the interface to to the iLO times out.
Reset a Blade or Bay (Virtual Re-Seat)
This is a very useful command line that will reset the entire bay. It is equivalent to physically removing the blade from the enclosure (extremely useful if using back-to-back blades)
Reset bay ##
Rename the Server Name in the iLO:
This allows you to rename the server in the iLO (and therefore the name in the Onboard Administrator)
cd system1
set oemhp_server_name = TestValue
show oemhp_server_name
exit
Useful Tools–Troubleshooting on a Microsoft Platform
I spend a great deal of time troubleshooting Windows Servers. I try and use free or open source tools wherever possible. Here are my favourite/most frequently used. I tend to have copies of most of these with me at all times on a USB stick, as you never know when they might be useful.
This is by no means an exhaustive list of troubleshooting tools, but these tend to be the ones that I use the most.
If any other technical support professionals find that they tend to use a utility very frequently, I would be interested to know. I intend to keep this list up-to-date.
Process & Performance
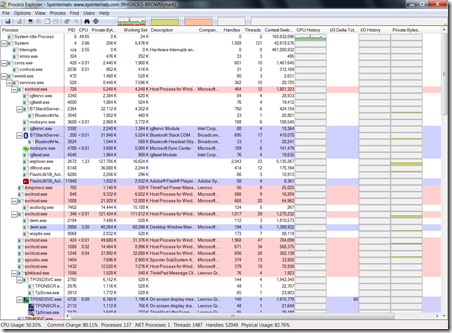
Microsoft Process Explorer – Part of the Sysinternals Suite, developed by Mark Russinovich, and is currently in it’s 15th major version. It is perhaps the most useful tool in my arsenal. It is what Task Manager should be, with the default view showing a tree structure containing the system processes in a parent-child relationship. It allows you to examine threads, dlls, handles, performance information, the list goes on and on. This is practically a one stop shop for examining running processes and could easily have it’s own instruction manual.
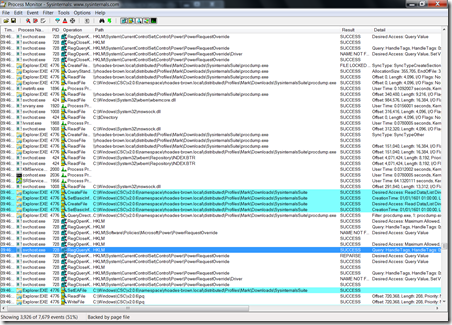
Microsoft Process Monitor – Another must have tool from the Sysinternals Suite, developed by Mark Russinovich and Bryce Cogswell. This tool provides real time monitoring of process activities such as process start and stop, file reads and writes, network reads and writes, registry reads and writes and process profiling. You can compare process activities, examine a process’ stack at any point, etc. You can even configure it to start capturing events at boot time- can be very useful.
Microsoft Sysinternals Suite – The full collection of Sysinternals tools, including Process Explorer, Process Monitor, PSList, PSExec, PSInfo, handle, ProcDump and many more.
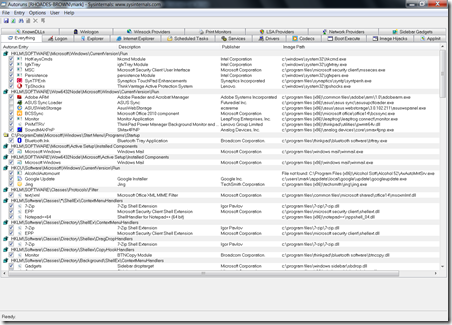
AutoRuns – Yet another superb utility from the Sysinternals Suite. This one displays everything that gets loaded during the start-up process. It includes everyway I have ever thought of, and then some. Registry ‘Run’ keys, startup groups, explorer shell extensions, IE Browser helper objects, Scheduled Tasks, Services, Drivers, Winsock Providers, Print Monitors, LSA Providers, Network Providers, Sidebar Gadgets, CODECS, Boot Execute, Appinit & Winlogon. It even shows image hijacks. You can disable the items with the tickboxes, jump to that place (either an explorer window or registry editor), delete them, etc.
Windows Performance Monitor – Built into windows, this is a very useful utility for monitoring performance counters collected by the system. Every new version of Windows includes more counters. The tool can be configured to collect performance data in the background, for later review. This can be scheduled to run easily, and has very little impact on system performance.
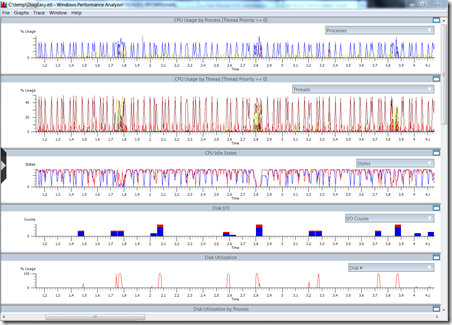
Xperf & The Windows Performance Toolkit – Included as part of the Microsoft Windows SDK (a very useful collection of utilities and tools), Xperf taps into the ETW and can pull out tons of data-
Windows Debugging Tools – The latest version is again included in the Microsoft Windows SDK. After configuring symbols, you can analyse crash dumps, process dumps, live processes and live systems. This is the tool that I would most like to learn to use, and the one I find most difficult to master.
Disk Utilities
MyDefrag – Simple to use disk defragmenter. This is not pretty to look at, but is an excellent tool. It can provide a detailed log output, and can defragment however you want it to. It uses simple scripts to perform the defrag, with included scripts for system and non-system disk monthly, weekly and daily scans. You can also find other scripts on the website for more specialist uses.
SpaceSniffer – Visualisation of disks and folders allowing you to easily understand the layout of the disk and where the space is being used. It creates a treemap, where the folders are shown as regions with files and subfolders as subregions.
Network Monitoring
Microsoft Network Monitor – Monitors network traffic, allowing capture, viewing and analysing data from many network protocols. The later versions can work in promiscuous mode and even support wireless networks.
TCPView – Another Sysinternals utility – this provides an easy to use, easy to view interface which will show protocol, connections, connection states, sent and received, local address and port, remote address and port, etc. You can terminate the process responsible, or close the port. Addresses can be auto-resolved and you can perform a whois.
Miscellaneous
7-zip – A tiny, simple, open source compression / decompression utility that can extract from and compress to many different compressed file formats. It also includes a 7-zip file format, which has superb compression ratios. Available in 32-bit and 64-bit versions.
Notepad++ – An open source text editing application that is incredibly feature rich. It is small and very fast, has superb search facilities and has display abilities for a variety of components such as XML, VBS, C, C++, C#, HTML, VB, Perl, JavaScript, PHP, PowerShell, SQL and more. The Find & Find/Replace features are brilliant, with multiple find methods including using regular expressions. A plugin architecture allows you to install and use extra features (such as the included spell checker)
HRPlus – This is a little utility for looking up HResult error codes. It can search within DLL files too, making it rather useful.
Excel Split Rows Where Columns Different
I caught a colleague of mine working through a CSV document in Excel, he was putting blank rows in to separate data by a column, to make it easy for him to analyse the text, he was trying to achieve the results bellow:
| A | B | C | |
| 1 | Server Name | Event ID | Description |
| 2 | Server1 | 12 | Details |
| 3 | Server1 | 12 | Details |
| 4 | Server1 | 1 | Details |
| 5 | |||
| 6 | Server2 | 12 | Details |
| 7 | Server2 | 12 | Details |
| 8 | |||
| 9 | Server3 | 12 | Details |
My colleague was manually putting the extra rows in, as row 5 and row 8. Problem was there was about 18,000 rows, over 200 servers. So, I wrote him a short script to do the sorting.
A few days later, he asked me for help modifying the script to select the new column, and to start on a different row. Instead of doing this every time, I modified the script to do it starting on the highlighted cell. So, in the example above click cell A2, and run the script below.
I hope you find it useful:
1: Sub InsertLine()
2: Dim i As Long
3: PreviousLine = ActiveCell.Row
4: CurrentLine = PreviousLine + 1
5: ColumnNumber = ActiveCell.Column
6: While CurrentLine < Rows.Count
7: If Cells(CurrentLine, ColumnNumber) <> Cells(PreviousLine, ColumnNumber) Then
8: Rows(CurrentLine).Insert
9: CurrentLine = CurrentLine + 1
10: End If
11: PreviousLine = CurrentLine
12: CurrentLine = CurrentLine + 1
13: Wend
14: End Sub
