Archive
Posts Tagged ‘VMware’
Configuring Windows 2008 R2 Core on VMware ESXi
January 16, 2012
Leave a comment
Pre-Requisites
- ESX(i) 4.1 or higher (as we will use the PVSCSI controller as the boot device. I use ESX 5.0 in this example.
- Microsoft Windows Server 2008 R2 iso image on a datastore.
- The Core Configuration 2.0 (x64) iso image– This simplifies updating the drivers.
Installation Steps
Create a new Virtual Machine.
- Create a new VM.
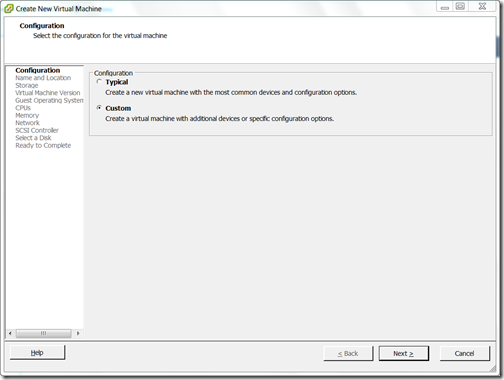
- Select Configuration ‘Custom’.
- Name the virtual machine.

- Select a suitable datastore.

- Select ‘Virtual Machine Version: 8’
- Select Guest Operating System ‘Windows’, Version ‘Windows Server 2008 R2 (64-bit)
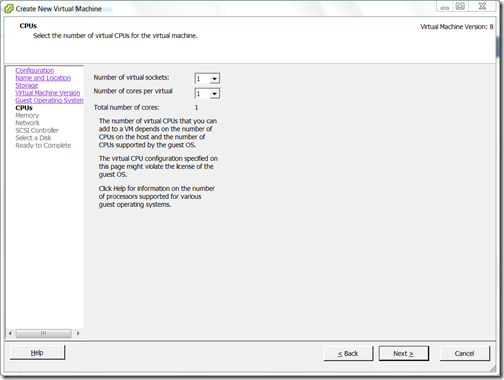
- Select the number of CPU virtual sockets and cores according to your needs.
- Select the amount of memory according to your needs.
- Set ‘How many NICs do you want to’ to how many NICs you require. Select the network and set the adapter to ‘VMXNET3’.
- Set the SCSI controller to ‘VMware Paravirtual’
- Select to create a new disk. Choose the capacity of the new virtual disk and the Disk provisioning type.
- Leave the advanced options to the default values.
- Click the ‘Edit the virtual machine settings before’ and press Continue.
- Go into the options tab, Advanced –> Boot Options. Select ‘EFI’ Firmware type.

- In the Hardware tab, select ‘New CD/DVD (adding)’. . Tick the ‘Connect at power on’. Check the ‘Datastore ISO file:’ and press Browse. Select your ISO image.

- Select ‘New Floppy (adding)’. Tick the ‘Connect at power on’. Check the ‘Use existing floppy image in datastore:’ and press Browse.
- Look in the ‘Datastores\vmimages\floppies’ folder and select ‘pvscsi-Windows2008.flp’

- Click Finish.
Install Windows 2008 R2 Core
- Open the VM’s console.
- Power on the VM.
- Press any key to boot from the DVD. If you miss it (it can be too quick for the console to react), press Ctrl+Alt+Insert (that sends a ctrl+alt+del to the VM. Try again.
- When setup has started, select you regional settings. Press Install Now.
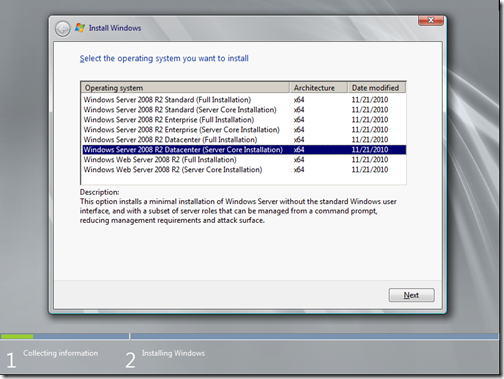
- Select the Windows version.
- Accept the EULA.
- Choose a ‘Custom (advanced)’ installation.
- On the ‘Where do you want to install Windows?’ page, click the ‘Load Driver’ link. Press the OK button.
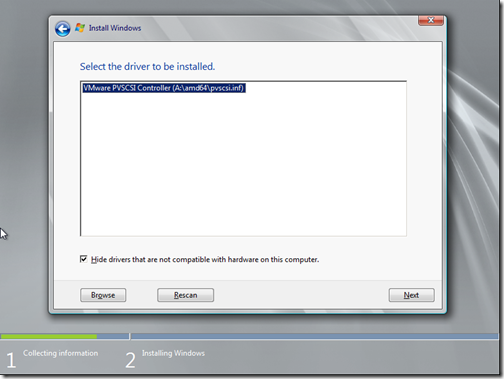
- On the ‘Select a driver to be installed.’ dialog, ensure ‘VMware PVSCSI Controller (A:\amd64\pvscsi.inf)’ and press ‘Next’ .
- Back in the ‘Where do you want to install Windows?’ page, ‘Disk 0’ should appear. Click ‘Next’
- Windows will install.
Configure Windows 2008 R2 Core
- Once Windows is installed, confirm the Administrator password and log on.
- You will be presented with a command prompt. From the VM console’s toolbar, select the ‘Connect/disconnect the CD/DVD device of the virtual machine’ button and select ‘CD/DVD drive 1’ –> ‘Disconnect from the datastore image’
- From the VM console’s menu bar, choose ‘VM’ –> ‘Guest’ –> ‘Install/Upgrade VMware Tools’.
- Run the setup program from the command prompt. Type ‘D:’ press enter, type ‘setup’ and press enter again.

- Install the VMware Tools using all of the default options. Allow setup to reboot the operating system once installation has completed. The NIC drivers, VMware keyboard and VMware mouse will be installed.
- Log back in.
- Select the ‘Connect/disconnect the CD/DVD device of the virtual machine’ button and choose ‘Connect to ISO image on a datastore’. Locate and choose the Microsoft Core Configuration iso image.
- Start Core Config by typing ‘D:’ and pressing enter, type ‘Start_Coreconfig.wsf’ and press enter.
- A dialog asking to install the .NET Framework and Microsoft PowerShell appears, press the ‘Yes’ button.
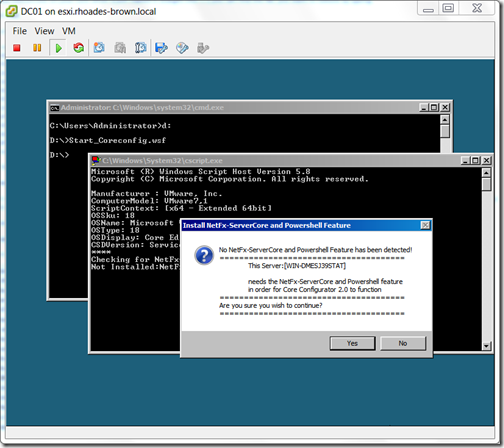
- Press the ‘Control Panel’ button, press ‘Add drivers’.
- Press the ‘Have Disk…’ button. Navigate to ‘C:\Program Files\Common Files\VMware\Drivers\wddm_video’ and select ‘vm3d.inf’.
- The updated driver driver will be installed. Exit the Core Configuration and restart the VM again. The VM restart at a higher resolution, with better mouse precision and you will be able to pass the edges of the window. The Core Configurator tool is very useful for configuring a Windows Core server, you can use it to install and remove features, configure and perform Windows updates, Remote Desktop and Remote management, computer name, domain membership, DC Promo and licensing.
Categories: Microsoft Windows, Server, VMware
core, ESX, ESXi, PVSCSI, server core, VMware, VMXNET3, vSphere, Windows Server
Building a DD-WRT Image In vSphere 5.0
October 7, 2011
14 comments
Introduction
I have a need to put a router between my test ESXi 5.0 server and my network. At home, I use a Linksys E3000 (both 2.4Ghz & 5Ghz Wireless-N, gigabit) router, with OpenSource DD-WRT custom firmware. There is a x86 variant that can be downloaded, people mention in the forums about using it on old PCs, I thought I would give making a VM a go.
Pre-Requisites
- An installed copy of ESXi 5.0 (this is almost certain to work on 4.0, but not 3.5)
- The DD-WRT x86 Image. I chose the VGA public image. This is a free version, limited to 4096 connections (fine for my purposes) and without Wi-Fi support. The image that is used is here.
- physdiskwrite – A Windows tool for writing raw images to a hard disk.
- An existing Windows image.
InstallationCreating the Virtual Machine
- Create a virtual Machine. Select a configuration type of Custom.
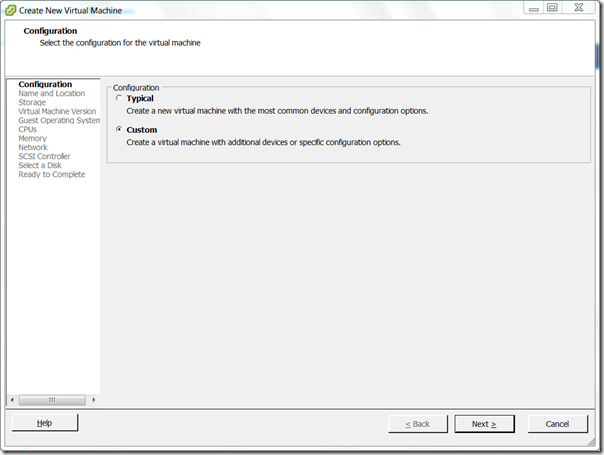
- Name the VM something appropriate.
- Select a datastore for the Virtual Machine.
- Select ‘Virtual Machine Version: 8’ (if using ESXi 4.0, using version 7)
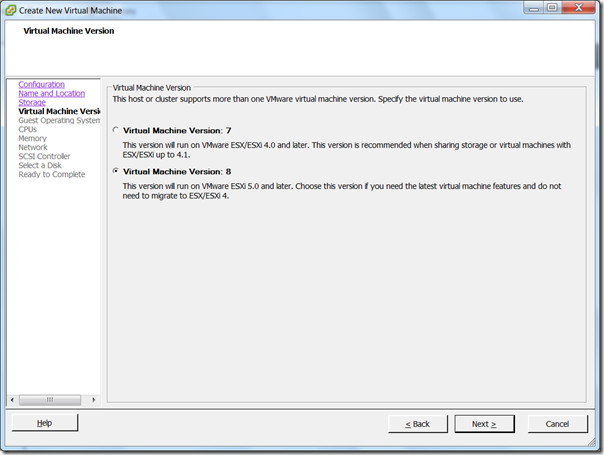
- For Guest Operating System type, choose ‘Linux’ and select ‘Other 2.6.x Linux (32-bit) from the drop down.
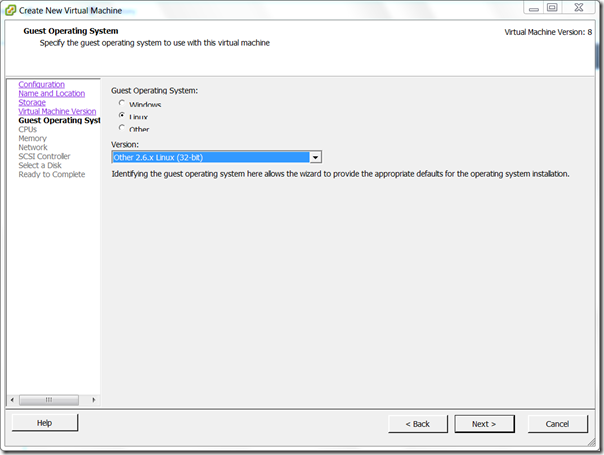
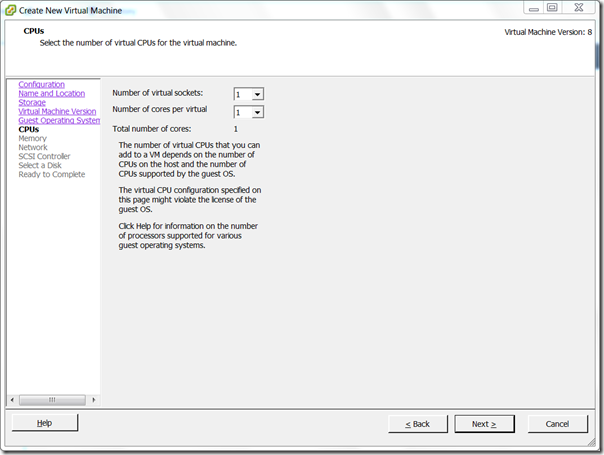
- Choose 1 virtual sockets, with one core per virtual socket.
- Choose 512MB RAM.

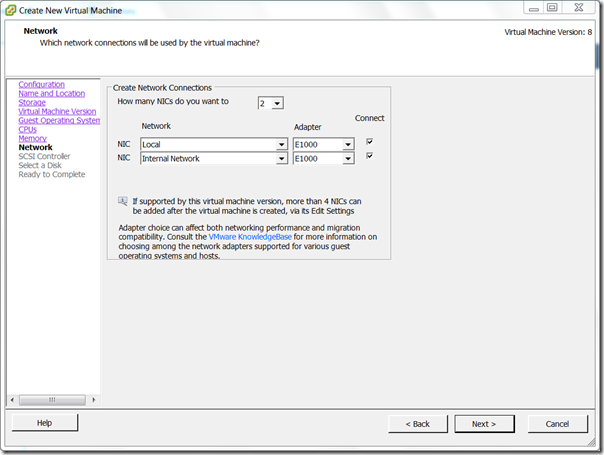
- Select the appropriate number of NICs (nearly always 2), E1000, and choose the port groups. (I have found that the first NIC is assigned to the WAN)
- SCSI Controller, choose any. This will be replaced.
- Choose not to create a disk.
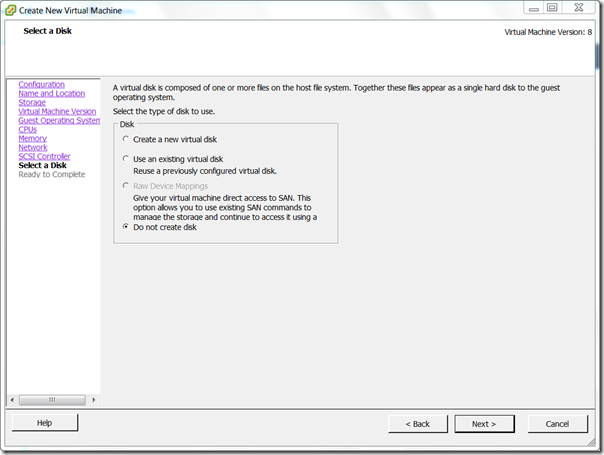
- Tick Edit the virtual machine settings before.
- In the Virtual Machine Properties, click Add. Select Hard Disk.
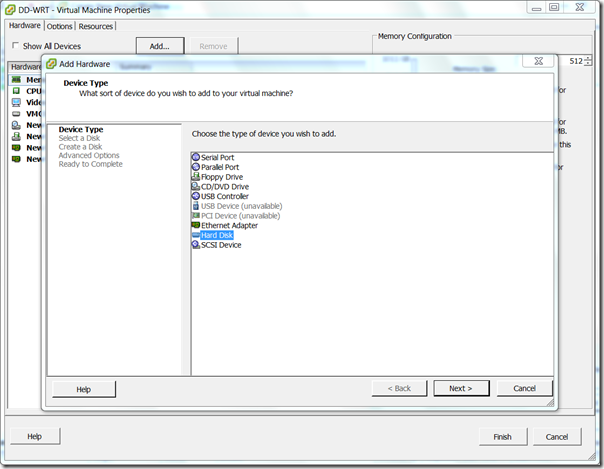
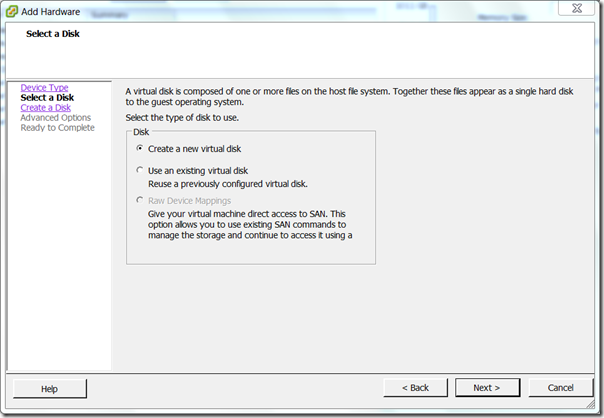
- Select ‘Create a new virtual disk’
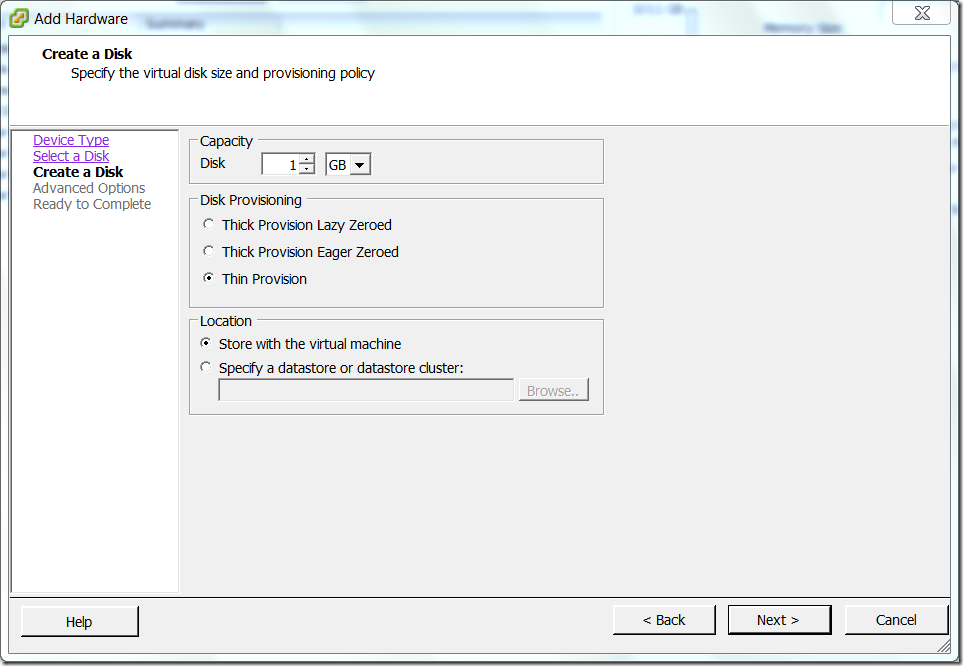
- Make the capacity of the disk 1GB. I chose to make it Thin Provisioned.
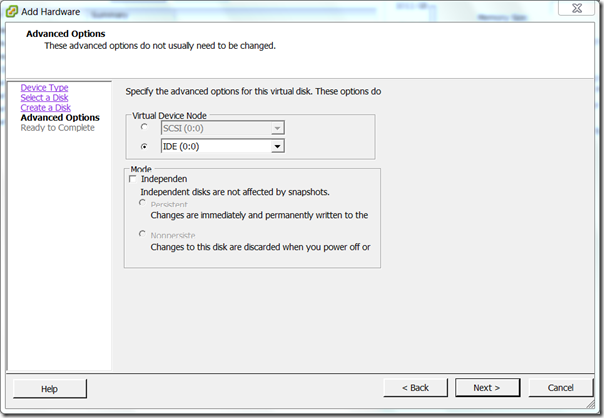
- Set the Virtual Device Node to IDE (0:0)
- Press OK, then Finish. Wait for the VM to be created.
Install the image to the Disk
- Choose your Windows VM. Power it off if necessary.
- Edit the Windows VM’s properties. Press Add.
- Select a Hard Disk.
- Choose ‘Use Existing Virtual Disk’
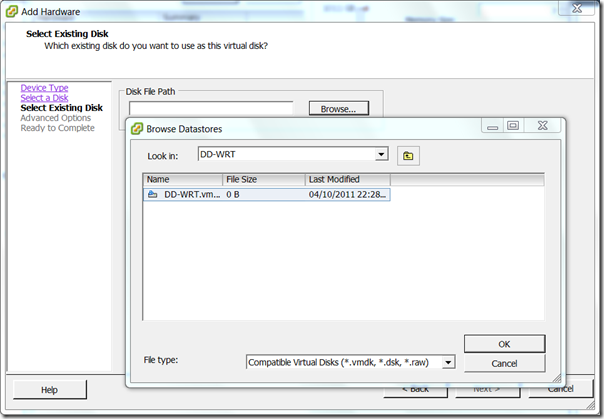
- In Advanced Options, ensure that the Virtual Device Node is ‘IDE (0:0)’
- Click OK, then Finish. Power on the Windows VM.
- Load PhysGUI (make sure you elevate it)
- Ensure that you select the ‘VMware Virtual IDE Hard Drive ATA Device’, right click select ‘Image laden’ –> ‘Öffinen’. Select the downloaded DD-WRT image.

- Click OK through the prompts.
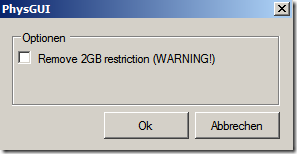
- Wait until the disk completes writing. Shut down the VM.
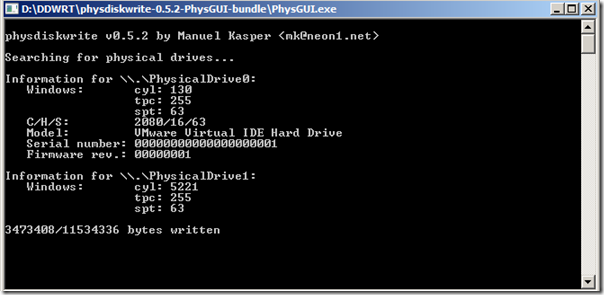
- Edit the Windows VM’s properties. Select the DD-WRT virtual disk and press remove. Ensure ‘Remove from virtual machine’ is selected. Click OK.
- Start up the DD-WRT VM.
Connecting to the Router
- Load another VM on the same LAN as the router. Ensure that it is configured to automatically obtain an IP address.
- It should be assigned an IP by the DD-WRT router’s DHCP server service. You can see this by performing an ipconfig (if using a Windows client)
- Presuming that you have an IP address, use the web browse to connect to 192.168.1.1
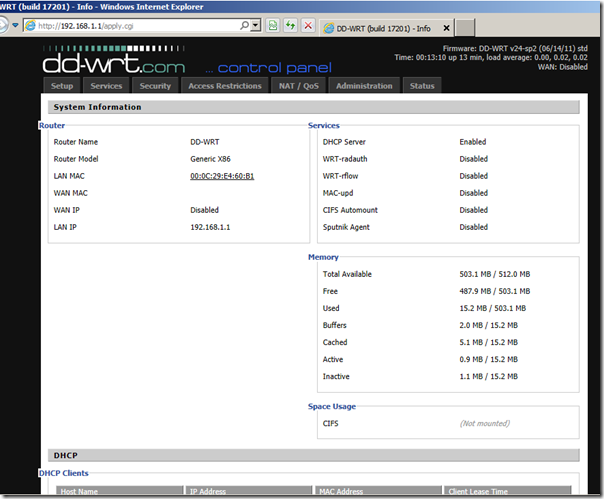
- It will ask to set the username and password. Note that if you SSH into the router at a later point, it will use the username ‘root’ with the password set here.
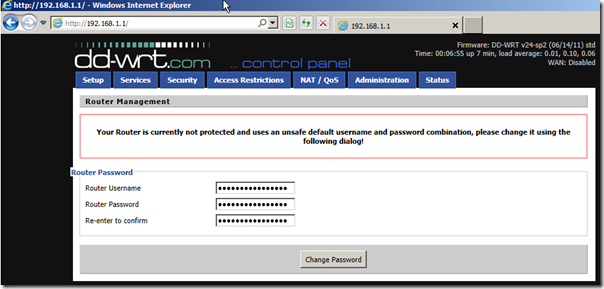
- You are presented with the DD-WRT System Information page. This will show the current hardware, configuration, DHCP client list, etc.